4.1 KiB
iOS 环境配置指南
本文档介绍如何为 Open-AutoGLM 配置 iOS 设备环境。
环境要求
- macOS 操作系统
- Xcode(最新版本,在App store中下载)
- 苹果开发者账号(免费账号即可,无需付费)
- iOS 设备(iPhone/iPad)
- USB 数据线或同一 WiFi 网络
WebDriverAgent 配置
WebDriverAgent 是 iOS 自动化的核心组件,需要在 iOS 设备上运行。
1. 克隆 WebDriverAgent
git clone https://github.com/appium/WebDriverAgent.git
cd WebDriverAgent
直接点击WebDriverAgent.xcodeproj即可使用Xcode打开。
2. 设置 Signing & Capabilities
-
在 Xcode 中选中
WebDriverAgent,出现General、Signing&Capabilities等选项。 -
进入
Signing & Capabilities选项卡 -
勾选
Automatically manage signing。在Team中选择自己的开发者账号 -
将 Bundle ID 改为唯一标识符,例如:
com.yourname.WebDriverAgentRunner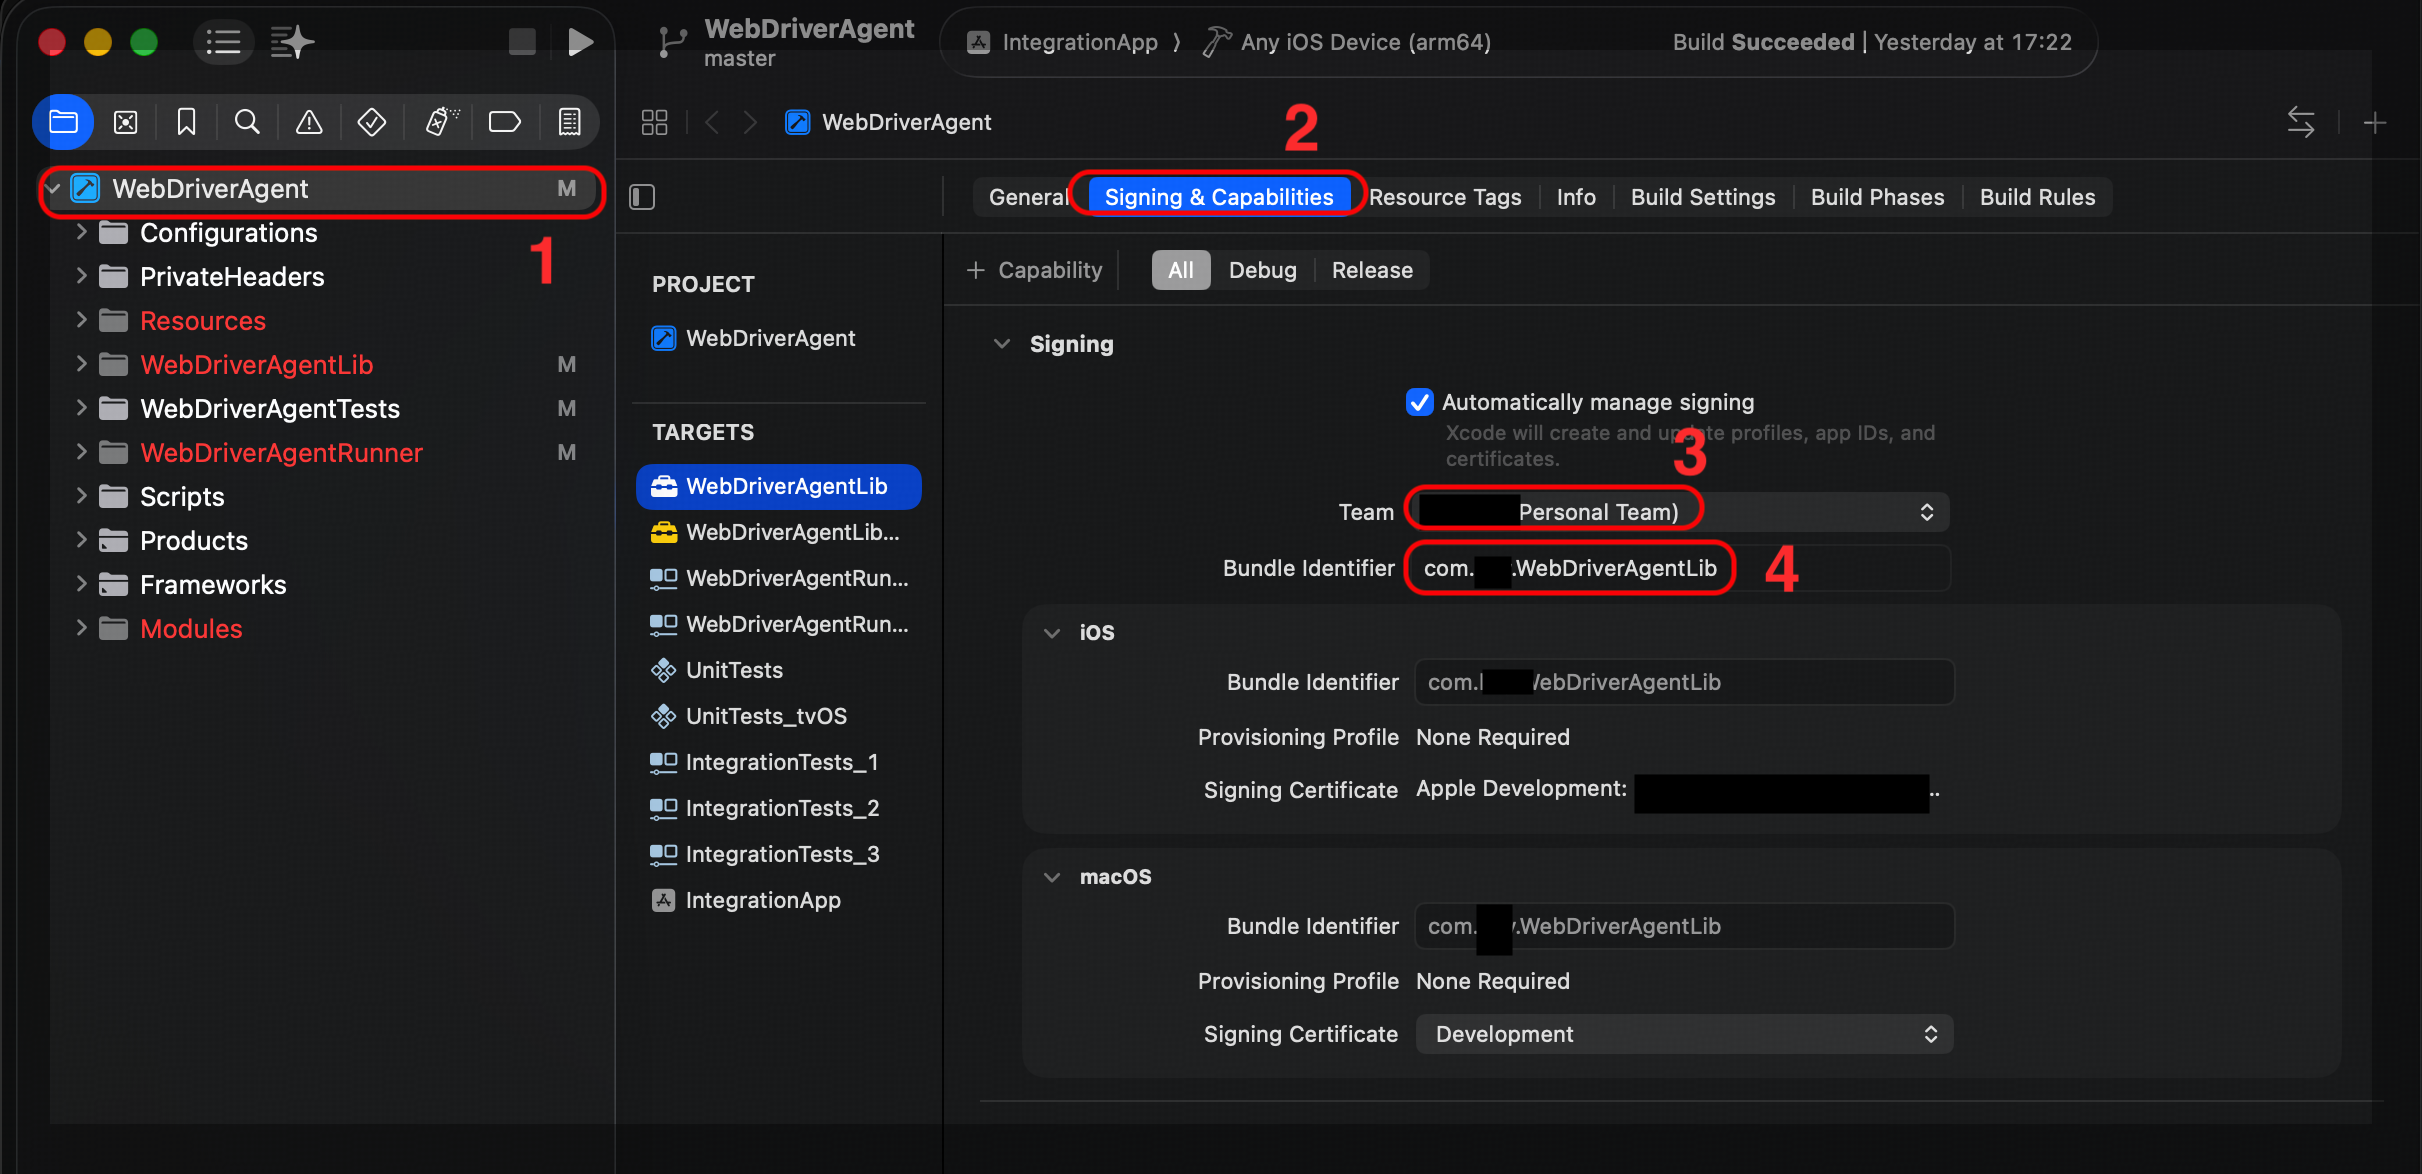
-
TARGETS中,建议将WebDriverAgentLib、WebDriverAgentRunner、IntegrationApp的
Signing & Capabilities都按照相同方式设置。


3. 测试XCode的GUI模式和UI自动化设置
建议先测试GUI模式能否成功安装WebDriverAgent,再进行后续步骤。 Mac和iPhone有USB和WiFi两种连接方式,建议通过USB方式,成功率更高。
通过 WiFi 连接
需要满足以下条件:
- 通过USB连接。在Finder中选中连接的IPhone,在“通用”中勾选"在 WiFi 中显示这台 iPhone"
- Mac 与 iPhone 处于同一 WiFi 网络之下
具体步骤
- 从项目 Target 选择
WebDriverAgentRunner - 选择你的设备

- 长按"▶️"运行按钮,选择 "Test" 后开始编译并部署到你的 iPhone 上

部署成功的标志:1. XCode没有报错。2. 你可以在iPhone上找到名为WebDriverAgentRunner的App
设备信任配置
首次运行时,需要在 iPhone 上完成以下设置,然后重新编译和部署:
-
输入解锁密码
-
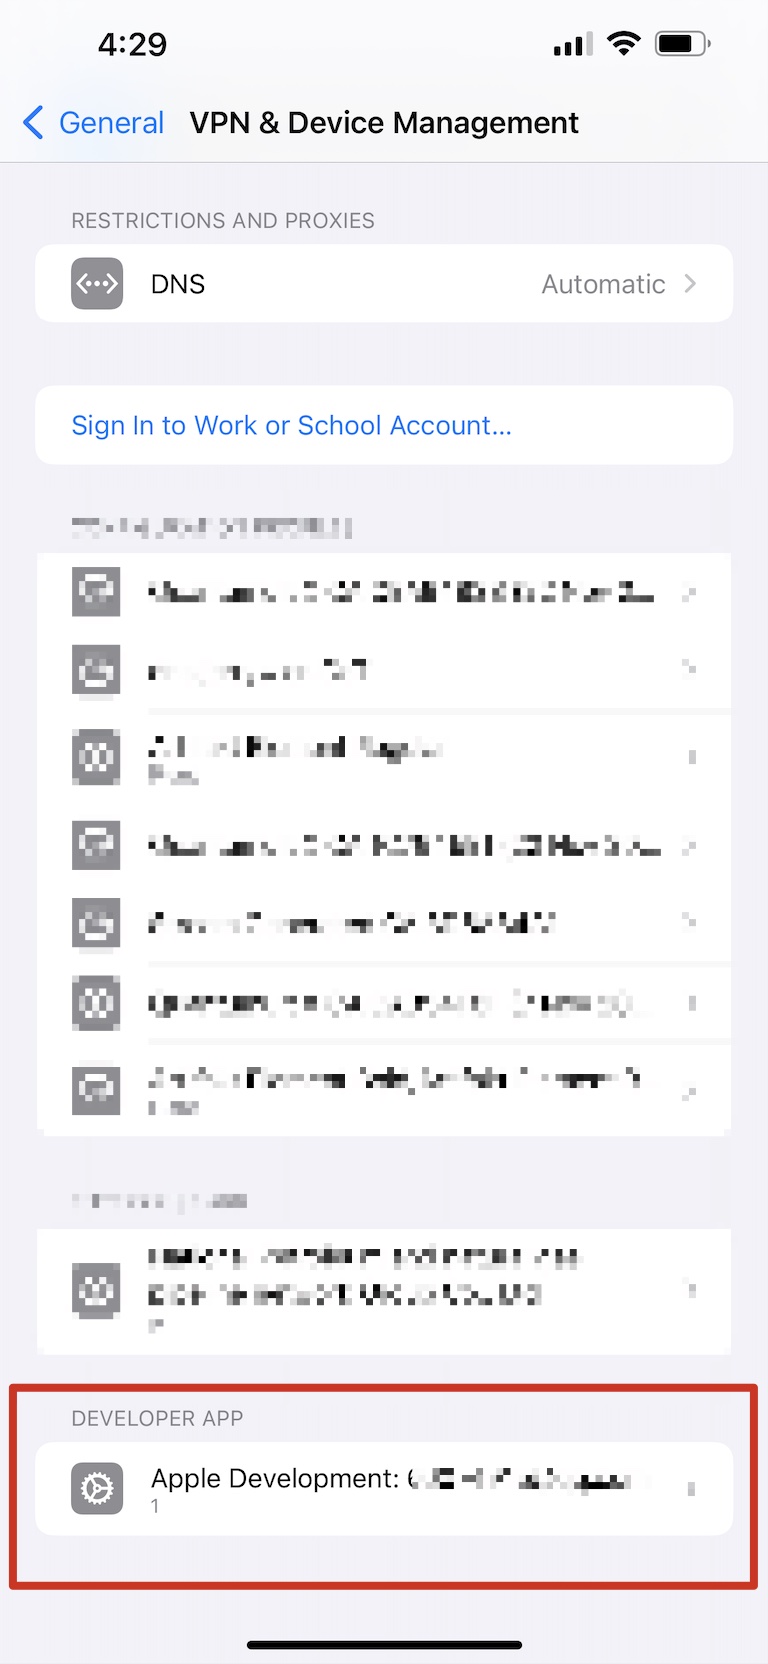
信任开发者应用
- 进入:设置 → 通用 → VPN与设备管理
- 在“开发者 App”中选择对应开发者
- 点击信任“XXX”
-
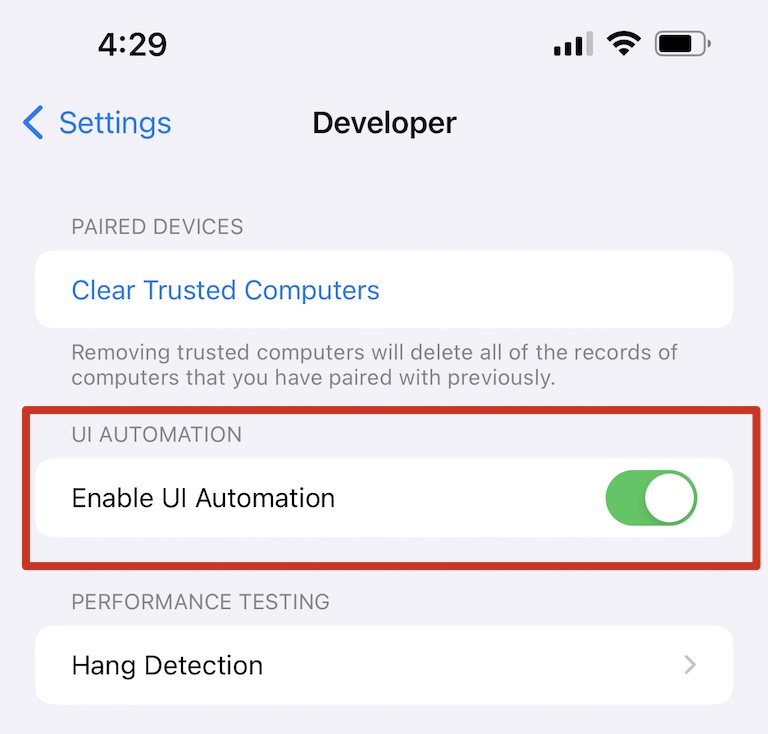
启用 UI 自动化
- 进入:设置 → 开发者
- 打开 UI 自动化设置


4. XCode命令行模式部署
1.安装libimobiledevice,用于与 iPhone / iPad 建立连接与通信。
brew install libimobiledevice
# 设备检查
idevice_id -ln
2.使用xcodebuild安装WebAgent。命令行也需要进行“设备信任配置”,参考GUI模式下的方法。
cd WebDriverAgent

xcodebuild -project WebDriverAgent.xcodeproj \
           -scheme WebDriverAgentRunner \
           -destination 'platform=iOS,name=YOUR_PHONE_NAME' \
           test
这里,YOUR_PHONE_NAME可以在xcode的GUI中看到。 WebDriverAgent 成功运行后,会在 Xcode 控制台输出类似以下信息:
ServerURLHere->http://[设备IP]:8100<-ServerURLHere
同时,观察到手机上安装好了WebDriverAgentRunner,屏幕显示Automation Running字样。 其中,http://[设备IP]:8100为WiFi所需的WDA_URL。
使用 AutoGLM
以上配置完成后,先打开一个新终端,在后台建立端口映射(使用WiFi连接则不需要):
iproxy 8100 8100
之后,打开一个新终端,通过以下命令使用AutoGLM(WiFi则使用上述获得的WDA_URL):
python ios.py --base-url "YOUR_BASE_URL" \
    --model  "autoglm-phone" \
    --api-key "YOUR_API_KEY" \
    --wda-url http://localhost:8100 \
    "TASK"
参考资源
如有其他问题,请参考主项目 README 或提交 Issue。